
Scissors trim photo essay - body and butt
Equipment used: 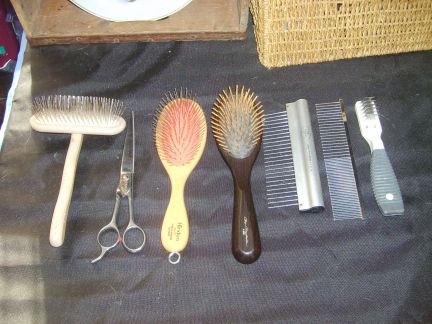 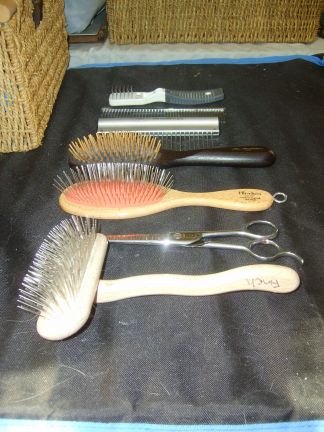 Before: 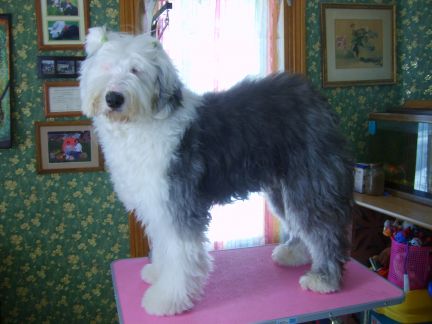 Normally I would lay Chewie down to line brush next. But, seeing I had just brushed and bathed 2 days prior, I knew I wouldn't encounter many snarls and mats, so I line brushed him while standing. I use either the light colored Hindes pin brush or the wood pinned CC (dark brush) for this. 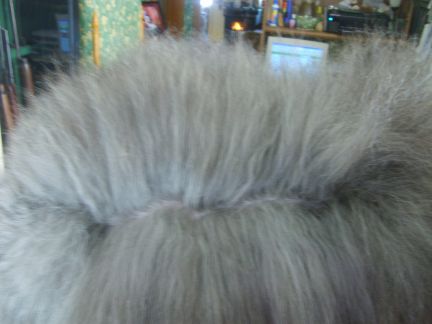 It is very important to get every row of line brushing down to the skin. If even a small mat or snarl is left in, it will multiply like crazy! Taking the time to do it thoroughly will save time in the long run. Brushing the butt - I go up for the hair above the tail dock, down below it. 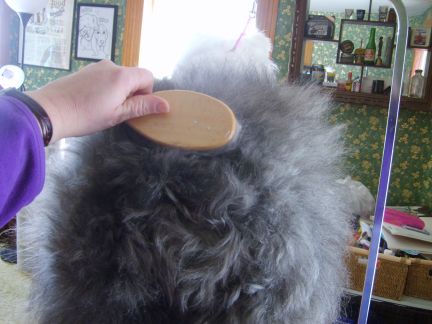 I used a comb on his chest, as I find it difficult to get all the snarls out in this area with just a brush: 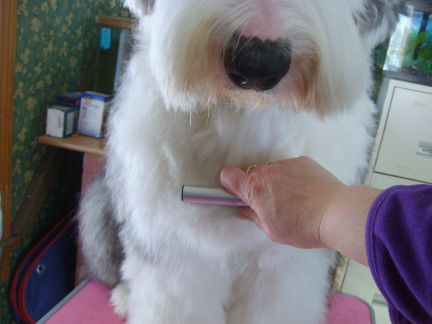 I also use the comb to go down the legs and face/neck after using the pin brush. Especially to make sure no mats are forming in the armpits, behind ears (and under the collar area if your dog wears one at home). After line brushing: 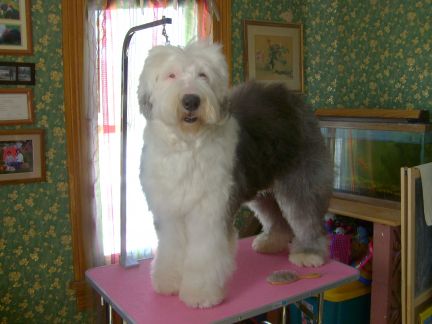 Trimming the topline- I use a modified show cut, in that I have it contoured and rounded. If we go somewhere, I can fluff it. I often do this as part of a TDI demo to show the different grooming we do. I take the center section of the back and comb or brush it so it stands straight up. This is the 1st cutting of the body, and mostly determines how long the coat will be. I was trimming a couple inches off. Here it is mostly trimmed, just a chunk remains near the withers: 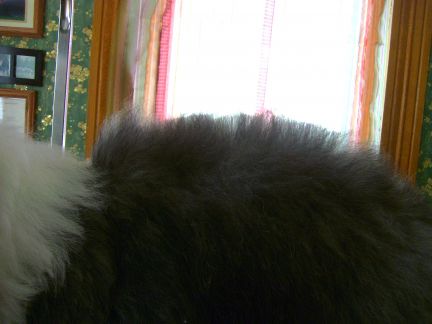 trimming the last bit: 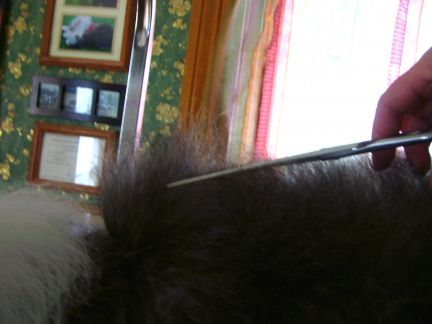 and the finished topline: 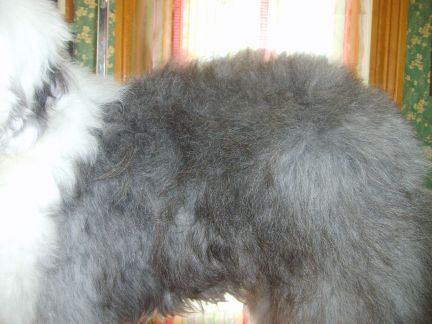 Then, continue fluffing and cutting the same amount off on each side of the body, neck and head for the desired look. Sorry no pictures of the neck and face trimming. I was too engrossed, apparently.... Next I did some stripping to the shoulder, neck and chest area. Many dogs get a very thick coat here, and looks better if you thin a bit out. I use the little gray and white stripper from the equipment picture for this. I got a picture, but it is a bit awkward. I was home alone, so I was trying to take pictures with one hand and demonstrate with the tools in the other. This one should have 2 hands in the picture! Starting at the lowest point, lift up a layer of hair w/ the nondominant hand, and strip with the other hand. Let another layer drop down w/ the nondominant hand, and strip again. Continue until you are all the way up (in this case to the withers): 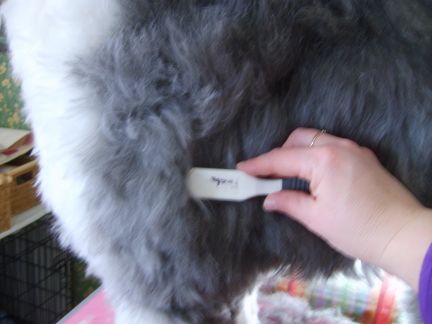 I hope you can see the hair above the stripper pushed up - imagine a hand holding it in place! Butt trim: Using the wide toothed (butt) comb, fluff the hair by pulling it out towards you. 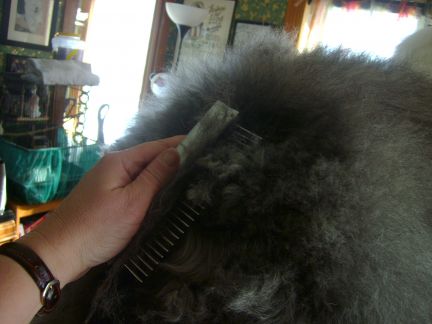 It will look quite uneven. 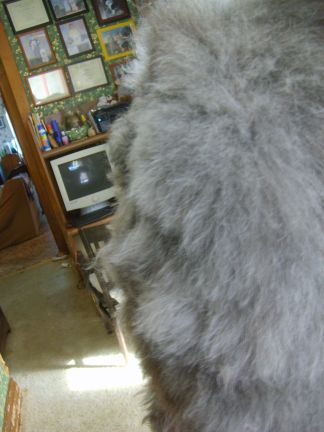 Next I use my hand and feel the slope of the pelvis - above the tail/dock to between the hip bones. For Chewie, this is the best angle to trim, so I use this as my guide. Using the scissors, trim the area like a flat plate. I use the butt hole/tail as my center, and trim outward in a circle, rotating my hand so the tips of the scissors always are pointing outward. 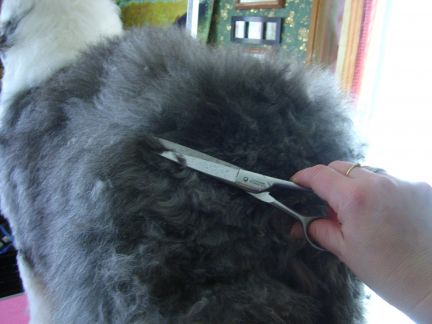 Contue to refluff with the butt comb and trim, until you get the desired look. Here is the done profile (sorry for the tipped rooms in the 2 butt profiles - at least I kept them similar for comparison purposes 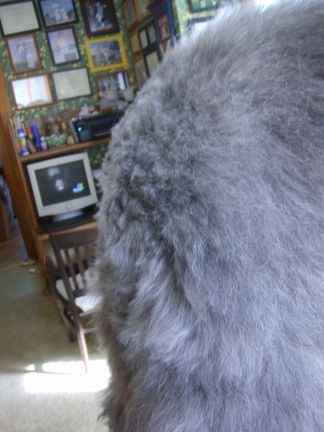 And a rear view of the finished butt: 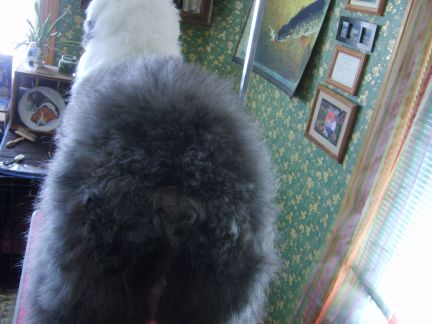 Also it has been mentioned to use a box under the dog if they are just in training to stand for grooming on the table. At shows I always used my portable softside cooler, here's a picture showing a cooler used as a block to aid in training to stand: 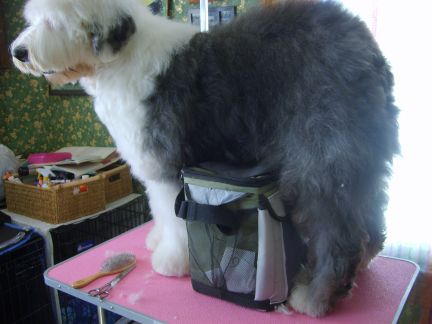 And the completed scissors trim: 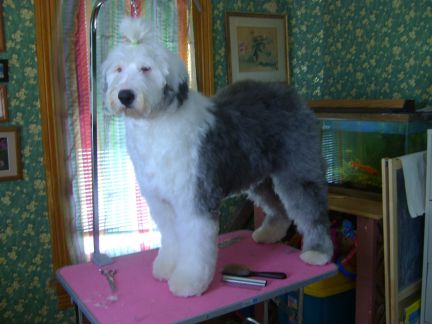 Next will be the belly shave |
|
|
| Dawn you are fantastic! This is very, very helpful and I appreciate all the hard work you put into this. Also, I had wondered how you got your guy to keep standing for all this. I never thought of a box, what a clever idea! |
  we havent gota table but manage to do Summer on the floor! I tried her with a soft foot stool under her tummy to keep her standing. She kept trying to stand on the stool sort of like a performing seal! but we will get there we havent gota table but manage to do Summer on the floor! I tried her with a soft foot stool under her tummy to keep her standing. She kept trying to stand on the stool sort of like a performing seal! but we will get there |
Just Perfect!!   |
| Dawn, I officially LOVE YOU!!!! This is the only thing the forum is missing in my opinion, the more people that post help like this, the better. It would be great to see as many people's techniques as possible. And it deserves it's own section.                 |
| I am glad you posted this - would prefer it if you could find the time to come on out and deal with the "coat" |
I just noticed how cute Chewie's nose is. It's like someone came along with a paintbrush & painted it on  |
| Chewie is certainly a good looking dog. |
   great job Chewie looks Beeeaufitul great job Chewie looks Beeeaufitul |
| Just wondering if one of the administrators could make this post of Dawn's a sticky so old and new members could always find it easily. Plus the other two photo essays that Dawn has posted. AWESOME work Dawn, Thanks a ton! |
* Capt. Obvious Danger wrote: Dawn you are fantastic! This is very, very helpful and I appreciate all the hard work you put into this. Also, I had wondered how you got your guy to keep standing for all this. I never thought of a box, what a clever idea! When Chewie was a puppy, he had a hard time with the long show grooming. This really helped when he was learning. Now he just stands there, but it was a super easy solution to a pup and young dog that kept sitting while prepping. It could be dangerous too - if I had a scissors and he moved suddenly. |
Hint of Mischief wrote: I just noticed how cute Chewie's nose is. It's like someone came along with a paintbrush & painted it on  Thanks I told Chewie too |
| Thanks guys. I knew Chewie would be a good subject, as he has endless patience. And he needed a trim and it was my day off. Luckily it was too cold to do anything, so we tackled this. It is an idea that has been floating around in my head for awhile. I thank my mentors for all the specific OES help and the fact that when I was a poor college student I cut hair for extra $$$ ! |
| Thanks Dawn!! A great job and photos make it that much easier to understand. You're a marvel. |
| Dawn, You are the bomb!!! Thank you so much for this much needed photo essay. Now what about the legs and making the front legs look like straight columns along with the rounded paws. Tried so many different groomers over the years,same result,always shaved my baby. Started learning to groom my own, and am still learning. So thank you again. Robin |
| How do you start the training for getting groomed?? My pup is 5 1/2 months and HATES the brush and comb. I've just been giving him treats while I brush little bits to keep him distracted. I have no idea how on earth I would get him to lay there for any type of line brushing!?!?!? Any advice would be greatly appreciated! |
| My advice is to start as soon as the OES is born,no just kidding,however before 8 weeks of age.Start with just laying a puppy on a grooming table,use a pin brush and brush the puppy. Clean their ears on the grooming table along with their paw pads.Daily lay the puppy on the grooming table to brush the puppy.Non fattening treats can be rewarded for calm behaviour or even a high valued chew. That is my recommendations,but if you got the puppy say at 5 months then I would still do the above.Eventually he will cooperate and look forward to the grooming sessions and fall asleep. Is he food motivated? Robin |
MollyinPDX wrote: How do you start the training for getting groomed?? My pup is 5 1/2 months and HATES the brush and comb. I've just been giving him treats while I brush little bits to keep him distracted. I have no idea how on earth I would get him to lay there for any type of line brushing!?!?!? Any advice would be greatly appreciated! I'm not sure there are many dogs who "love" being brushed. My dogs will lay there for 1.5 hrs ...but that's because they know through lots of past attempts that I WILL NOT let them up. I say 1.5 hrs because it's at this point where both will start trying to get up again, and after being good for soo long... I don't deny them the right to call it a day. The more I push them through longer "short" sessions with encouragement... the easier the next time is. Every dog I've had has always started off not liking it... but I force them to stay and eventually they give in |
| My OES fall asleep.I have to be relaxed.I think my dogs cue off of my mood also. By the time I am finished I literally have to wake them up. So you want the puppy to relax, and like, not only a brush but YOU touching,massaging and praising the dog.Your voice should be like music to their ears and find this time spent together is a bonding experience. Hope this helps. Robin |
MollyinPDX wrote: How do you start the training for getting groomed?? My pup is 5 1/2 months and HATES the brush and comb. I've just been giving him treats while I brush little bits to keep him distracted. I have no idea how on earth I would get him to lay there for any type of line brushing!?!?!? Any advice would be greatly appreciated! You would be amazed what the purchase of a grooming table will do for you. Asterisk will run around the house and not let me touch her. But once she's on the table, she'll lay down and sometimes fall asleep. |
| Puppies need to be handled everywhere and touched, brushed, nails trimmed, all that stuff from as early as possible. Ideally, this is started in the puppy's 1st home by the breeder. At our house ours are always wanting to be the one groomed. 1 - they want the attention. Even those that don't care for nail trimming are torn between not wanting it done and wanting the attention. 2- Make it a positive experience. Give treats, lots of love. 3 - You are the boss - you decide when to stop, not the dog. But - use common sense. Read signs and stop before your dog is upset or restless - you always want to quit on a good note and leave them wanting more. If you weren't doing this (or a previous owner if a rescue or similar situation) from day 1 - know you wil have to work a bit harder. Every dog should have training and manners enough to let you take care of it properly. |
| Dawn, I've been really thinking about doing the butt trimming. Wendel and Asterisk have about 4 inches of hair right now... should I wait to do the trimming till it's longer? I'm starting to have the poopy butt problem with Wendel again (I seriously wish he would arch his back when he goes I'm also pretty nervous... I think I'll do a terrible job! |
* Capt. Obvious Danger wrote: Dawn, I've been really thinking about doing the butt trimming. Wendel and Asterisk have about 4 inches of hair right now... should I wait to do the trimming till it's longer? I'm starting to have the poopy butt problem with Wendel again (I seriously wish he would arch his back when he goes I'm also pretty nervous... I think I'll do a terrible job! David tried to keep Mady's bottom clean by trimming it. Our groomer made me promise to never let him near Mady's bottom with a pair of scissors again, as he had basically cut a lovely round crater in her hair. Having said that, it grew out in no time, so my point is that, even if you mess it up, it will grow back. Mady only had a brief time as crater-butt puppy. I think that, having read so many posts here, we would do a better job of it now. Go for it and post pics!! |
* Capt. Obvious Danger wrote: Dawn, I've been really thinking about doing the butt trimming. Wendel and Asterisk have about 4 inches of hair right now... should I wait to do the trimming till it's longer? I'm starting to have the poopy butt problem with Wendel again (I seriously wish he would arch his back when he goes I'm also pretty nervous... I think I'll do a terrible job! I would start now. It is easier when it is shorter. And it's less obvious if you mistrim! When you fluff it up and start trimming, you can leave as much hair on as you wish. The part right by the butt/tail dock will be the shortest. If Wendell has a tail nub, you can use that as your starting point - trim no shorter than that and it will "disappear" - stay hidden in the hair. For a basic trim, imagine your dog as a box in the rear - 90 degrees - when viewed from the side. Then imagine a 45 degree angle over the back half. Tried to do it on the computer, but it posted not the way I keyed it in... |
| Trying again with my diagram....View of the rear from a side profile outline - the butt is the left, no head but it would be facing the right - not trimmed: ___________ l l l l l and trimmed: ***********_________ ********/ *******/ ******/ *****/ *****l *****l *****l maybe this will work...ignore the ****'s (what a pun for you!) and look at the lines. It wouldn't do a true 45 degrees, but maybe you can get the idea.... |
| That is a fantastic diagram!!! Makes me want to skip the groomers and try it again ourselves... |
got sheep wrote: Trying again with my diagram....View of the rear from a side profile outline - the butt is the left, no head but it would be facing the right - not trimmed: ___________ l l l l l and trimmed: ***********_________ ********/ *******/ ******/ *****/ *****l *****l *****l maybe this will work...ignore the ****'s (what a pun for you!) and look at the lines. It wouldn't do a true 45 degrees, but maybe you can get the idea.... I love it!!! Thanks, this makes it easier. I'm still uber nervous... but, I was nervous when I first starting shaving and trimming the face. |
| Keep looking at the sides as you do it, too, to make sure you're following the guide and blending in. They end up looking like they have old style car fins on either side if you can't blend it back in-- which I cannot do well yet. The next time by breeder trims Owen, I'm going to video the whole thing so I can use it as a reference tool and, if she doesn't mind, I'll share it here. |
ButtersStotch wrote: Keep looking at the sides as you do it, too, to make sure you're following the guide and blending in. They end up looking like they have old style car fins on either side if you can't blend it back in-- which I cannot do well yet. The next time by breeder trims Owen, I'm going to video the whole thing so I can use it as a reference tool and, if she doesn't mind, I'll share it here. I know the look. I see it in the ring and I want to grab my scissors and fix them.... The key (as Jill says), is blending it in, looking how the butt and sides all fit together. It is easier when short, so a good time to start. The longer it gets, the better you need to be. And once you get a good shape and angle started, maintaining it as it grows is the way to go. |
got sheep wrote: ButtersStotch wrote: Keep looking at the sides as you do it, too, to make sure you're following the guide and blending in. They end up looking like they have old style car fins on either side if you can't blend it back in-- which I cannot do well yet. The next time by breeder trims Owen, I'm going to video the whole thing so I can use it as a reference tool and, if she doesn't mind, I'll share it here. I know the look. I see it in the ring and I want to grab my scissors and fix them.... The key (as Jill says), is blending it in, looking how the butt and sides all fit together. It is easier when short, so a good time to start. The longer it gets, the better you need to be. And once you get a good shape and angle started, maintaining it as it grows is the way to go. So do you recommend using blending shears towards the edges of the angle? |
| It wouldn't hurt to use thinning/blending shears for that. You always do less damage that way. As you trim, keep puffing it and letting it naturally fall and take the pieces off that are sticking out unnaturally. I think it's a lot harder to get the fins when they're shorter anyway. I scalped Clyde's butt the last time I trimmed him and managed to blend it pretty easily. Owen's always another story. He has enough hair to cover an elephant. |
| If in doubt, you sure can use a thinning shears. They are a lot more forgiving. I use a straight scissors, but it was the way I was taught. I see people at shows using thinning shears to do the exact same thing, so it's more a case of how you learn it and what you're comfortable with. Definitely keep fluffing and trim, fluff and trim. This will get the most natural and blended look. Are you ready to trim yet??? |
got sheep wrote: If in doubt, you sure can use a thinning shears. They are a lot more forgiving. I use a straight scissors, but it was the way I was taught. I see people at shows using thinning shears to do the exact same thing, so it's more a case of how you learn it and what you're comfortable with. Definitely keep fluffing and trim, fluff and trim. This will get the most natural and blended look. Are you ready to trim yet??? Oh, I'm so nervous, Dawn!  I've just never tried a trim like this before and I'm so scared I'm going to REALLY muck it up. But I know it would be SO much easier to keep Wendel's rear clean without all that hair getting in the way. Asterisk could benefit from the trim too. I just hope my hands don't shake while I'm attempting the trim to badly!! I've just never tried a trim like this before and I'm so scared I'm going to REALLY muck it up. But I know it would be SO much easier to keep Wendel's rear clean without all that hair getting in the way. Asterisk could benefit from the trim too. I just hope my hands don't shake while I'm attempting the trim to badly!! |
| Can you help with how you trim the paws to make them look so fluffy? |
Kim wrote: Can you help with how you trim the paws to make them look so fluffy? Sure can! I did pictures for the foot trim too. Ask away if you have questions after you read through it and the comments that follow. viewtopic.php?f=7&t=28712 |
| Thanks! I actually just found that section. I guess it just takes practice as my boy's paws don't look that fluffy when I'm finished. After trimming around the bottom, you just work your way up a little not taking much hair off? |
Kim wrote: Thanks! I actually just found that section. I guess it just takes practice as my boy's paws don't look that fluffy when I'm finished. After trimming around the bottom, you just work your way up a little not taking much hair off? Just enough to make the leg look like a tube or column. The important thing is to keep fluffing and trimming - many times! and for the legs, it will look the most natural if you use the scissors with the blades pointing down (with the growth of the hair). Sometimes I have to point up, as the angles are just bad! Worst is to cut across or horizontal (OK for around the very bottom of the feet, after that don't!)...trust me, it leaves a big line... Another thing is to go around and around each leg...sometime I feel like a contortionist when I do leg trimming! And maybe he just needs to grow more hair?? |
| Talking about just the paws after you trim around the bottom edge by the nails (like in photo), how do you keep the fluff as you round the top of the paw? Scissors up, down or horizontal? Thanks for the help! |
Kim wrote: Talking about just the paws after you trim around the bottom edge by the nails (like in photo), how do you keep the fluff as you round the top of the paw? Scissors up, down or horizontal? Thanks for the help! Ahh - scissors down I actually do the trimming just above the paws with the tips of the scissors skimming the table surface. And I start with a nice blunt toe (in front of the center two toenails), then round it from there. I hope that makes sense! Oh, and if you trim toemails 1st, you get a better looking foot trim! Otherwise the scossors is trying to trim where the toenails are...quite frustrating and looks like crap (again, been there, done that!). |
Didn't find exactly what you're looking for? Search again here:

Custom Search
|
|
| |
|
|
|
|
|